

September 21, 2025, 4:19 pm | Read time: 6 minutes
Depending on the style of yoga, the focus can be on strength, endurance, balance, breathing, or flexibility. For the latter, I discovered my love for Yin Yoga some time ago: In this practice, you remain in individual positions (asanas) for several minutes, gently stretching deep-seated tissues like fascia, tendons, and ligaments. At the same time, Yin Yoga has a calming effect on the nervous system, reducing stress—a common trigger for back pain and tension. Of course, complaints and what helps are individual, but if you, like me, spend a lot of time sitting, the following asanas might also be beneficial for your back.
Follow the FITBOOK channel on WhatsApp now!
Finally, No Need to Give 100 Percent
Unusual but true: In Yin Yoga, you don’t need to give 100 percent! Since you sink into an asana for five minutes, you shouldn’t be overexerted and should be comfortable (keyword relaxation), 60 to 70 percent intensity is completely sufficient.
1. Get Twisted! Eagle Arms for the Upper Back
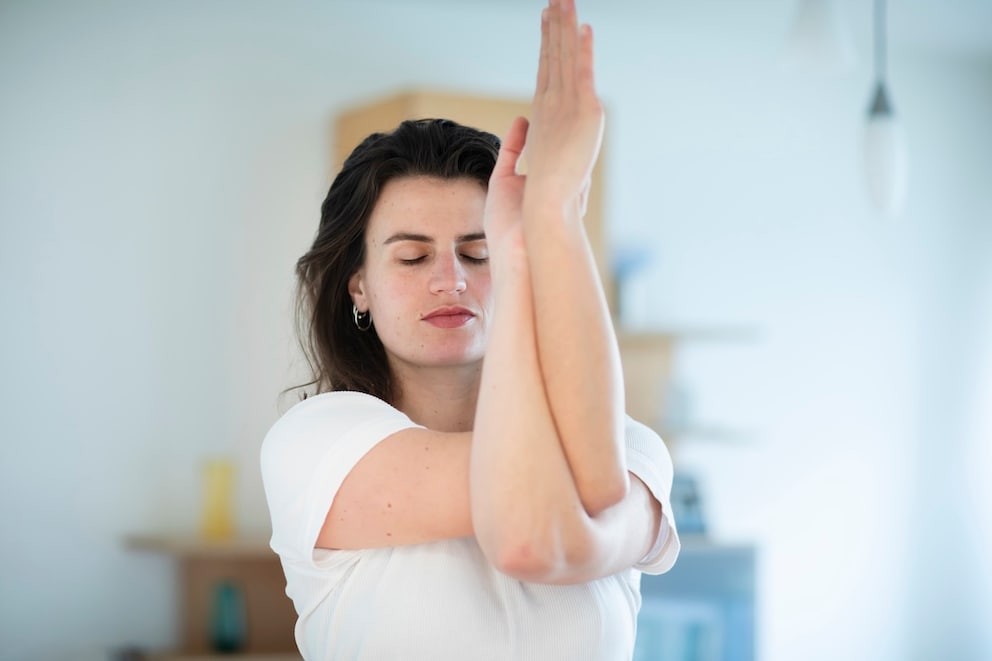
In the classic eagle pose (Garudasana), you entwine your arms and legs, but there is also a relaxed seated version (such as cross-legged) that focuses solely on arm positioning. Sometimes I just do the asana briefly right at my desk when I feel like my back is “tightening up.”
- Starting position: Begin seated upright in a cross-legged position (or standing). Gently engage your core, and let your shoulders drop.
- Cross arms: Cross your arms, bringing your elbows together. Palms facing each other.
- Align: Lift your elbows to about shoulder height, keeping shoulders away from your ears.
- Breathe: With each inhale, gently lift your elbows up and forward, and with each exhale, let the area between your shoulder blades soften.
- Details: Keep your shoulders relaxed and your core slightly engaged, with your elbows at shoulder height.
- Release: Slowly release, open your arms wide, and let your shoulders relax.
- Repeat: Repeat with the opposite arm on top.
By crossing your arms, you allow space for your shoulder blades when muscles are tight and tissue is hardened, gently stretching the shoulder muscles. At the same time, the serratus anterior muscle, which stabilizes the shoulder blades, is engaged—relaxing overactive neck muscles. If the asana feels uncomfortable in the neck area, you can perform it with your elbows slightly lower and rest your left hand on a thick pillow or yoga bolster.
Also interesting: I practiced “the crow” every day for two weeks
2. Half Shoulder Stand for Circulation and Relaxation
The following asana is a gentle variation of the shoulder stand and resembles the candle pose you might remember from gym class. A yoga block, a thick book, or a cushion can be used as a prop.
- Starting position: Begin lying on your back. The block can be placed vertically (see below) or horizontally under your lower back, depending on your needs. Bend your knees and place your feet flat on the floor, hip-width apart, with your arms at your sides.
- Roll up: Tilt your pelvis and lift your spine vertebra by vertebra onto your upper back.
- Position: Bring your knees over your hips. Extend your legs upward so they are at a 90-degree angle to your torso.
- Details: Keep your arms relaxed at your sides, and your gaze directed at the ceiling.
- Release: Bend your knees toward your chest, and slowly roll down vertebra by vertebra. Take a moment to neutralize your spine (e.g., bring both knees to your chest and gently circle).
The half shoulder stand relieves the lumbar and thoracic spine and lengthens the back extensors by gently reversing the position of the spine. As an inversion pose, it also supports venous return from the legs and is often felt to be a soothing relief for sitting-related back pain. If you find the asana difficult, you can practice it against a wall.

Effective Yoga Exercises for a Toned Bottom

Pilates: The 34 Traditional Exercises
3. Golden Gate Bridge for Lower Back Tension
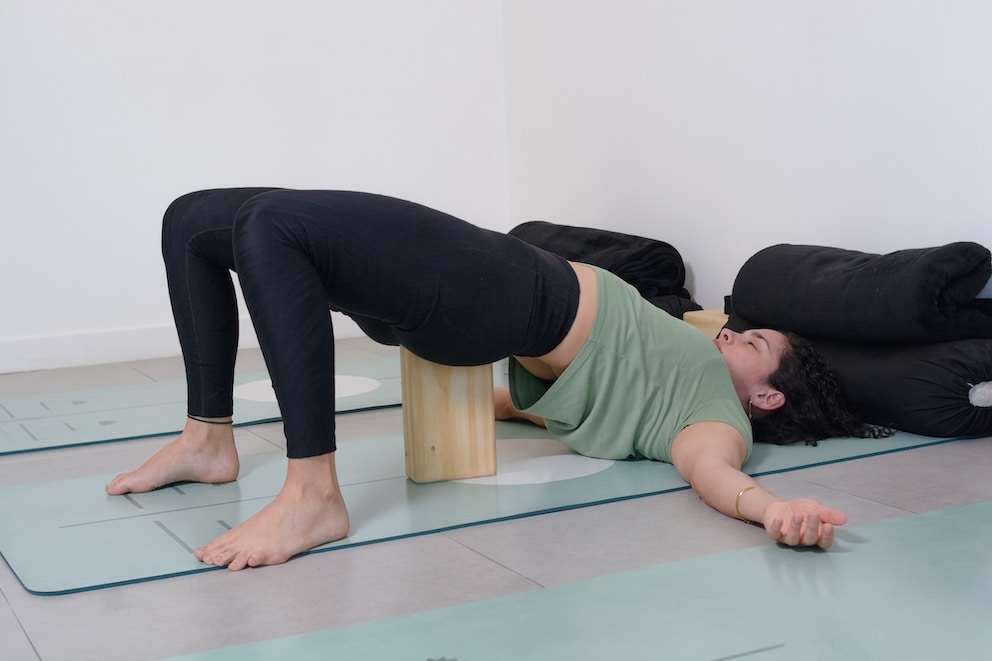
The Golden Gate Bridge (Setu Bandha Sarvangasana) is a pose that helps relieve tension in the lower back. It can be made more comfortable by placing a blanket over the yoga block.
- Starting position: Begin lying on your back. The block or cushion can be placed vertically or horizontally under your lower back, depending on what feels comfortable. Place your pelvis heavily on the block, with your arms at your sides.
- Build up: Lift your pelvis and place the block under your sacrum, adjusting it to a comfortable position. Rest your pelvis heavily on the block.
- Align: Keep your knees over your hips. Do not let your knees splay out to the sides.
- Details: Position your arms as needed, either at your sides or above your head.
- Release: Place your hands on the block, lift your pelvis slightly, remove the block, and roll down vertebra by vertebra.
The passive support under the sacrum allows the lumbar fascia and hip muscles to relax, which is often a soothing relief for sitting-related back pain. In the calm, slightly inverted position, the nervous system calms down; many find the pose regenerative, as the heavy leg work is relieved.
4. Mobilize Your Spine with a Reclined Spinal Twist
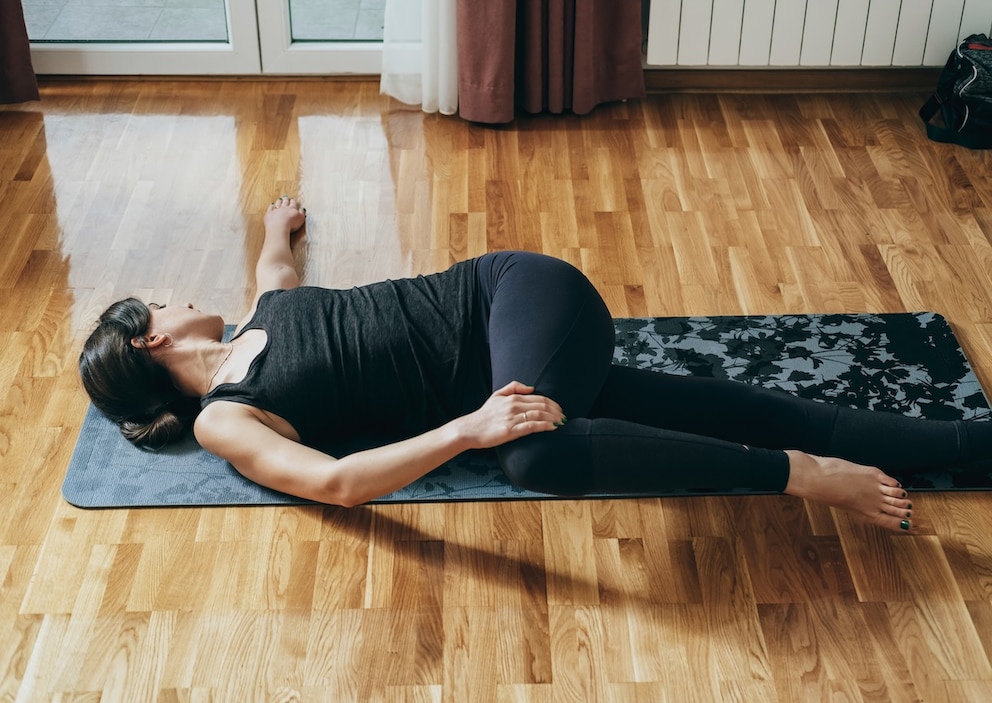
When my back pain makes me feel like I need a little “crack,” the one-legged reclined twist (Supta Parivrtta Merudandasana) from Yin Yoga is a blessing for my spine.
- Starting position: Begin lying on your back, with one knee bent and the other leg extended.
- Go into the twist: As you exhale, guide your bent knee across your body to the opposite side, extending your arm to the side and turning your gaze in the same direction or keeping it facing the ceiling. You can rest your opposite hand on your knee.
- Release: Inhale and bring your knee back to your chest, neutralizing your spine.
- Switch sides: Bring the other knee to your chest, then guide it into the twist on the opposite side, repeating the steps.
If the pose feels uncomfortable in the neck area, you can keep your elbows slightly lower and rest your forearms on a thick cushion or yoga bolster.
The one-legged reclined twist gently stretches the spine, lower back fascia, gluteal muscles, and lateral trunk muscles. The back muscles relax, which is often felt as a soothing relief for sitting-related back pain.